
Hi, I'm Jayme and this is my blog. Welcome! This is a place to come for crafts, DIY, furniture upcycling, recipes, occasionally the wonderful story of what my beautiful, crazy child has been up to, venting, cursing...you name it. This is my place to let my creativity flow and hopefully sharing it with you will help yours flow also!
Thursday, December 22, 2011
Merry Christmas!!
Merry Christmas! From my crazy child to you! Hope you all enjoy her lovely singing. This kid absolutely LOVES being video taped and then watching herself, she is such a ham for the camera too. Just wait for the end to see what I'm talkin about. Enjoy!! :)
Friday, December 16, 2011
Chickity China the Chinese Chicken!
Hey bitches! Alrighty, let's just go ahead and get things started. I'm here to give you yet ANOTHER amazing recipe of mine.... well it's not really mine I found how to make it online and decided to tweak it to the way I like it. Sooooo... if you love General Tso's Chicken, then you are in LUCK because I have an amazing recipe you can make at home that tastes amazing! I don't want to waste your time with this boring crap so let's get right to it...
WHAT YOU NEED:
2 lbs. boneless chicken breasts, cut into chunks
1 cup green onion, diced
vegetable oil - approx 2 cups to fry the chicken, and 1tbsp to cook the green onion
(I'm not really sure how much you will need to fry the chicken, so I just made that up. But you will want enough to cover about half the chicken as it is cooking in the pan. So 1 cup.... maybe 3... I'm not sure. I just dumped a bunch into my pan and thought it looked good!)
Cornstarch Mixture (the "breading")
1 cup cornstarch
1 egg, beaten
1/4 cup soy sauce
Sauce:
First thing I like to do is cut up the green onion and set it aside.
Cut yo' chicken up.
Preheat your oil to 350 degrees... I check the temp with a meat thermometer. I don't know if that's the best, but it is all I have so that's what I go with.
While your oil is heating, it's time to prepare the sauce. Get all your sauce ingredients and dump them into a Tupperware container. Then shake, shake, shake senora, shake your body line. Shake, shake, shake senora, shake it all the time!! Sorry... got distracted and now I have that song stuck in my head. But shake that sauce like it's a cranky baby. (hehe JUST KIDDING, you CAN'T do that to babies... or so I'm told.)
Now, for the cornstarch mixture that you will be bathing your chicken nuggets in. Beat the egg first, then add in the soy sauce, then the cornstarch. It's going to be SUPER thick, but that's how it should be. If it starts getting chunky, add some more soy sauce. I also suggest NOT packing your cornstarch because that will give you the chunky batter that you DON'T want. Which I made the mistake of doing, I just wanted this picture to look pretty. OOPS!
OK, now that EVERYTHING is ready, it's time to start cooking. Take your chicken chunks and dunk them into the batter, then plop them into the oil.... or place them in gently if you don't want oil splashing about and burning your beautiful hands.
I only cook about 7-8 pieces at a time to keep the temp of the oil at 350, and then place them in a bowl lined with paper towels while I do the next batch. This part is time consuming, but you have to do it. Sorry!
Now that you have your chicken cooked, it's time to make the sauce! I like to use a pot, the kind I make spaghetti noodles in, and I add about a tbsp. of vegetable oil and put the green onions in there and let them cook for about 30 seconds then I make sure my sauce is all shaken up and dump it into the pot.
Be sure to stir this continuously because it will start to thicken and you don't want anything burning.
Now you can throw your cooked chicken right into this pot, stir it all up and serve it! By this point you are probably going to be drooling over the chicken, just make sure none of your drool gets into the oil because that sh*t will spit right back. And it won't feel good.
So, you can serve this with rice, or lo mein, or whatever Asian/Asian-American side dish you can come up with. My lazy ass went with NO side dish. I don't like rice anyway, so I didn't bother making it.
For those of you who prefer it to be spicy, you can add whole peppers to the sauce, or some crushed red pepper for a little zing! But since I currently do not own any crushed red pepper, I went without it. I can never remember to buy it when I'm at the grocery store, I have big problems when I go grocery shopping. I'm lucky if I make it to the store with my list, if I even have one. I have gone without ketchup for over a week and I LOOOOOOVE ketchup. I finally made an effort to remember ketchup, and lucky for me I actually came home from the store with some today. Yipee! And I'm off topic again. So... I hope I didn't leave anything important out of this recipe, it's 1:00am and we just got back from a movie so I'm kinda sleepy but figured I would get this done while I had the recipe fresh in my brain. ENJOY!!!!!
Oh! and Happy Holidays everyone! :)
WHAT YOU NEED:
2 lbs. boneless chicken breasts, cut into chunks
1 cup green onion, diced
vegetable oil - approx 2 cups to fry the chicken, and 1tbsp to cook the green onion
(I'm not really sure how much you will need to fry the chicken, so I just made that up. But you will want enough to cover about half the chicken as it is cooking in the pan. So 1 cup.... maybe 3... I'm not sure. I just dumped a bunch into my pan and thought it looked good!)
Cornstarch Mixture (the "breading")
1 cup cornstarch
1 egg, beaten
1/4 cup soy sauce
Sauce:
1/2 cup cornstarch
1/4 cup water
1 1/2 teaspoons fresh garlic , minced
3/4 cup sugar
1/2 cup soy sauce
1/4 cup white vinegar
1/4 cup sherry wine or 1/4 cup white wine
14.5 ounces chicken broth (a can)
 |
| Go Cats! :) |
 |
| Chop to this size. Save this for later. It's just easier to get all of your ingredients ready for when you will need them later! |
Cut yo' chicken up.
 |
| I'd say these are about 1 inch cubes... maybe bigger, maybe smaller. I don't have a damn ruler so I couldn't tell ya exactly how big they are. |
While your oil is heating, it's time to prepare the sauce. Get all your sauce ingredients and dump them into a Tupperware container. Then shake, shake, shake senora, shake your body line. Shake, shake, shake senora, shake it all the time!! Sorry... got distracted and now I have that song stuck in my head. But shake that sauce like it's a cranky baby. (hehe JUST KIDDING, you CAN'T do that to babies... or so I'm told.)
 |
| ooh, it looks so yummy! It will smell strongly of vinegar, and that is how it's supposed to be. So don't mess with it. |
 |
| It will settle while you're cooking your other crap, but it's cool. Just shake the hell out of it again when you're ready for it. |
 |
| You need these things. |
 |
| It should look like this, but it will be difficult to stir. It's appearance is deceiving. |
 |
| kinda looks like peanut butter. yummy! |
 |
| Here's how your chicken should look when it's done frying. Make sure you cooked them thoroughly, don't want that nasty salmonella. |
Now that you have your chicken cooked, it's time to make the sauce! I like to use a pot, the kind I make spaghetti noodles in, and I add about a tbsp. of vegetable oil and put the green onions in there and let them cook for about 30 seconds then I make sure my sauce is all shaken up and dump it into the pot.
 |
| Like so. |
 |
| It is like magic!! |
 |
| Mix it in REAL good! |
 |
| Looks soooooooo good!! |
Oh! and Happy Holidays everyone! :)
Tuesday, December 13, 2011
Spicy Chex Mix
I am a huge fan of spicy food.... HUGE FAN! I love everything spicy. So why wouldn't I want to make spicy chex mix?! It is SOOOO delicious I am munching on it while I'm writing this. For those of you who don't like spicy food.... you can tweak the recipe to your tasting.
What you need: (keep in mind you can add WHATEVER you want)
4 cups Rice Chex
4 cups Corn Chex
2 cups Ritz Munchables
1- 8oz. bag of sea salted cashews
6 tbsp. Butter or margarine
4 tbsp. Worcestershire sauce
2 tsp seasoned salt
2 tsp garlic powder
1 tsp crushed red pepper or cayenne
1 tsp cajun seasoning
You can also add pretzels, rye chips, bagel chips... or whatever your heart desires. I would say 1-2 cups of whatever you prefer. Make it however you want!!! Go crazy!
First off, preheat your oven to 250 degrees.
Then, melt your butter in a microwave safe dish. Put it in a large roasting pan and add the Worcestershire, seasoned salt, garlic powder, and red pepper. Slowly mix in the rest of the ingredients and make sure to get all of it coated in the mixture.
Shove your mix in the oven and make sure to stir it up every 15 minutes for an hour. I tasted mine about half way through and decided it wasn't salty enough for my taste so I added some garlic salt to the mix and continued baking it for another 30 minutes.
This stuff turned out DELICIOUS. It's salty and crunchy and sorta spicy.... it's perfect. And the little Ritz crackers are to die for. I highly recommend those things!! Now go get your ass to the grocery store, pick up the ingredients and start making this now.
 |
| Since I don't like wheat chex or pretzels I decided to just use more of everything else. |
4 cups Rice Chex
4 cups Corn Chex
2 cups Ritz Munchables
1- 8oz. bag of sea salted cashews
6 tbsp. Butter or margarine
4 tbsp. Worcestershire sauce
2 tsp seasoned salt
2 tsp garlic powder
1 tsp crushed red pepper or cayenne
1 tsp cajun seasoning
You can also add pretzels, rye chips, bagel chips... or whatever your heart desires. I would say 1-2 cups of whatever you prefer. Make it however you want!!! Go crazy!
First off, preheat your oven to 250 degrees.
 |
| Don't get jealous cuz my oven rocks. Old school baby!!! |
Then, melt your butter in a microwave safe dish. Put it in a large roasting pan and add the Worcestershire, seasoned salt, garlic powder, and red pepper. Slowly mix in the rest of the ingredients and make sure to get all of it coated in the mixture.
 |
| This is all of it mixed up in a giant turkey roasting pan. |
 |
| This little girl can't keep her hands out of it she loves it so much! |
Holiday Popcorn!!
I'm sure a bunch of you are hosting or going to Holiday parties right about now and I've got a yummy, and cheap snack you can make for them. Here is a simple, fast recipe for some Holiday Popcorn! Or you can just call it Almond Bark Popcorn if your a Scrooge and don't enjoy the holidays!
All you need is:
1 bag of white popcorn (I also recommend lightly salted popcorn if you want a nice contrast of salty and sweet, which is what I prefer but I decided to tone it down with regular popcorn since I knew I was going to be giving some of this away)
1 - 24oz. block of vanilla flavored almond bark
SPRINKLES!
Start by putting your almond bark into a microwaveable dish and begin with 90 seconds. Some directions I found said to check it at 15 second intervals but I did 30 second intervals and it was fine.
While your almond bark is melting, get your popcorn ready. I bought a bag like this at the grocery store for maybe $2.00. Super cheap.
Lay your popcorn out flat on wax or parchment paper. I opted for parchment paper because it was all I had.
Now that your almond bark is nice and melty (which I forgot to take a picture of) you can begin drizzling it onto your popcorn.
Here's where it got difficult for me. I couldn't get it to drizzle, it was just plopping onto the popcorn in big gooey clumps (maybe it needed to be microwaved longer) so I ended up getting down and dirty. I just kinda dug into the almond bark with my hands and plopped it onto the popcorn and made sure I got it all mixed in. I think that worked best for me. Just sticking my hand right into the melted almond bark and rubbing it into the popcorn. But you can do whatever works best for you. I just have no patience and wanted to get the job done.
NOW here comes the fun part. Time for sprinkles!!!!
Some other fun things you could try is melting some chocolate morsels and putting the melted chocolate in a zip lock baggie and cutting a TINY hole in the corner and drizzling it onto the popcorn also. You could buy some colored candy melts (I find them at Hobby Lobby) in holiday colors and melting them and doing the same thing, drizzling it over the popcorn.You can add pretty much anything you like! And the best part is, you can put it in little baggies and hand it out as a CHEAP holiday gift. I know I love food, and receiving snacks as gifts would definitely make me happy!

Hope you enjoy your Christmahanukwanzika Popcorn!! Happy Holidays everyone!!
All you need is:
1 bag of white popcorn (I also recommend lightly salted popcorn if you want a nice contrast of salty and sweet, which is what I prefer but I decided to tone it down with regular popcorn since I knew I was going to be giving some of this away)
1 - 24oz. block of vanilla flavored almond bark
SPRINKLES!
Start by putting your almond bark into a microwaveable dish and begin with 90 seconds. Some directions I found said to check it at 15 second intervals but I did 30 second intervals and it was fine.
 |
| This is the almond bark after 90 seconds. Nothing happened to it in my microwave because my microwave is crap. |
 |
| I have a really bad problem of starting my projects and forgetting that I should put them in my blog. So I start taking pictures in the middle of my experiment and that is why you get some like this... an empty bag of popcorn. I really need to get my sh*t together. |
 |
| Like this. |
 |
| Here's what I had left.... but you can see how melty it is. Looks kinda like icing. |
 |
| This popcorn is actually coated in the almond bark now, but you can't really tell. You can barely tell while you're doing it either. I just started eating it and tried to discover which parts needed more flavor. |
 |
| I just dumped the entire container on this because I couldn't think of any other use I would have for Christmas sprinkles at the moment. But they look (and taste) damn good. I say go nuts!! You can never have too many sprinkles! |

Hope you enjoy your Christmahanukwanzika Popcorn!! Happy Holidays everyone!!
Country Fried Steak and disease.
The past couple days Kinsley has had a runny nose, and I think I got whatever she had, but worse. My Body hurts, my nose is stuffy, my throat is sore, and my skin hurts. UGH. Not much else for me to do other than sit on my couch and blog. Lucky you ;)
I have a new recipe for you guys to try! Over the weekend I attempted to make a country fried steak for the first time and I must say, they were pretty good!! Let's get started, shall we?
Ingredients:
1lb Cube Steak
2 c. Shortening (Crisco)
1 egg, beaten
1 c. buttermilk
salt and pepper to taste
1/4 tsp. garlic powder
1 c. all purpose flour
for the gravy:
1/4 c. all purpose flour
1 quart milk
salt and pepper to taste
Put the shortening into a pan (I used cast iron and it worked beautifully), heat oil to 365 degrees.
Get your meat ready...
Take the flour and garlic powder and combine in a shallow bowl.
In another shallow bowl, beat together egg, buttermilk, salt and pepper.
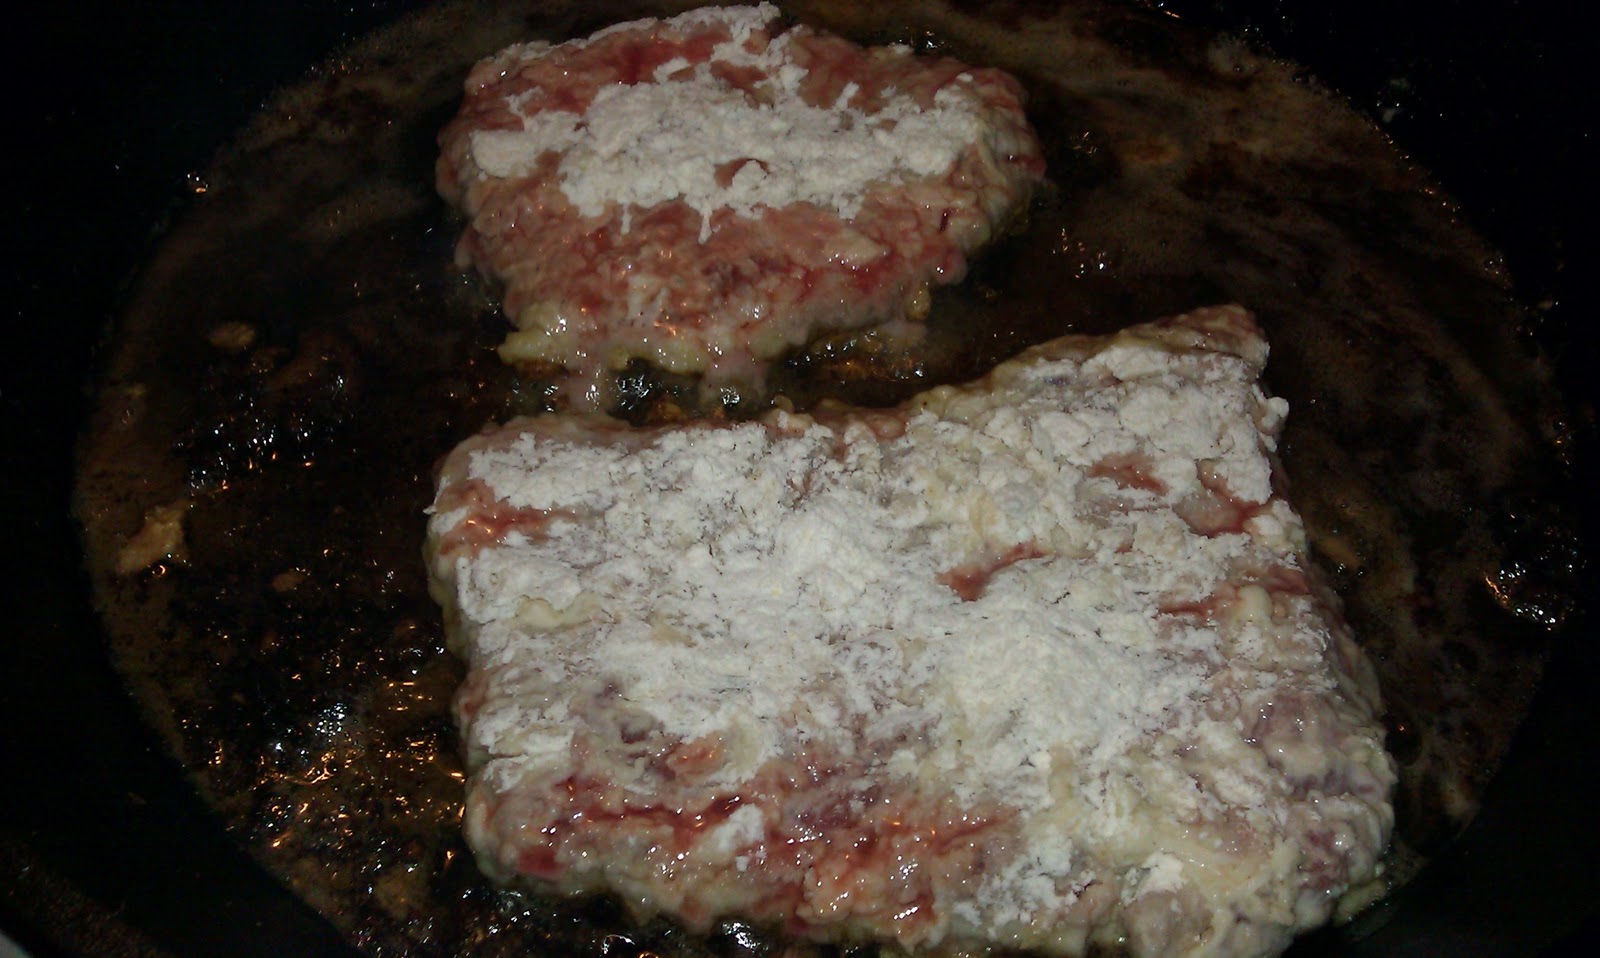
Dunk your meat into the buttermilk mixture, then flop it around in the flour mixture and make sure you coat it generously because I had some of it fall off white frying. And then plop it into the pan!
Now, if you can multi-task you can begin making your side dishes while these little patties are frying. I opted for some instant mashed potatoes, powdered gravy, and frozen corn (Classy as always). YUMMMMMY!! I got that sh*t started while the steaks were cooking.
And I don't have a photo of my corn, but we all know what that looks like. Deal with it.
But this is SOMEWHAT what your steaks should look like... mine might have fried just a bit too long but nonetheless they were delicious!
Now for the gravy, if you want to make it yourself. Reserve 1/2 c. of the grease/oil left in the pan. Blend in 1/4 c. flour to form a paste. Gradually add milk until you reach the desired consistency, stirring constantly. Heat through, and season with salt and pepper.
And there you have it folks! Some seriously delicious home cookin! And if you want to keep it super classy, you could even make your own potatoes! But I absolutely HATE the process of mashing a potato so instant works just fine for me! Ok, go run to the kitchen and start cooking NOW!
Now time for cute pics of my kid. She has her own Dora Kitchen and likes to cook, just like mommy.
Anyway, that's all I have for you guys. I am now going to heavily medicate myself and lay in bed and watch cartoons with my kid. Hope you're all having a better day than I am!!
I have a new recipe for you guys to try! Over the weekend I attempted to make a country fried steak for the first time and I must say, they were pretty good!! Let's get started, shall we?
Ingredients:
1lb Cube Steak
2 c. Shortening (Crisco)
1 egg, beaten
1 c. buttermilk
salt and pepper to taste
1/4 tsp. garlic powder
1 c. all purpose flour
for the gravy:
1/4 c. all purpose flour
1 quart milk
salt and pepper to taste
Put the shortening into a pan (I used cast iron and it worked beautifully), heat oil to 365 degrees.
Get your meat ready...
 |
| Trim off excess fat. Nobody wants to eat that crap. |
In another shallow bowl, beat together egg, buttermilk, salt and pepper.
 |
| Like so. Milky crap on the right, and the flour mix is on the left. I used tongs to flip my meat around while it was frying. |
 |
| Oh yum! Look at that nasty bloody juice creeping through the top of the meat. Makes me hungry. |
 |
| I followed the directions on the box to make these, and apparently THIS is supposed to feed 6-7 people. I'm pretty sure that could feed like 6-7 elves. What the crap? |
 |
| My instant gravy! I'm just too lazy sometimes to make the real stuff. |
But this is SOMEWHAT what your steaks should look like... mine might have fried just a bit too long but nonetheless they were delicious!
 |
| I had to keep adding shortening to the pan because my steaks kept sticking if there wasn't enough. So if you use more than 2 tbsp that is FINE! |
And there you have it folks! Some seriously delicious home cookin! And if you want to keep it super classy, you could even make your own potatoes! But I absolutely HATE the process of mashing a potato so instant works just fine for me! Ok, go run to the kitchen and start cooking NOW!
Now time for cute pics of my kid. She has her own Dora Kitchen and likes to cook, just like mommy.
 |
| Talking to Dora on the phone. We might need to start a Dora fan club, she is obsessed! |
 |
| Things are getting pretty serious in the kitchen! |
Saturday, December 10, 2011
A Trip Down the Rabbit Hole
Earlier I promised I would give you guys pictures of Kinsley's Alice in Wonderland party, so after waiting sooo patiently here you go...
And there you have it. I definately need to get a better camera so I can take better pictures of food. It never looks as good on my camera as it does in person. One day I'll make it my mission to guy buy a fancy camera. But I hope this gives you an idea of how cute it was. I didn't really take too many pictures since I was trying to run around the whole time. But I do know my dad has a TON that I haven't even seen yet.... he needs to get on that since her birthday was November 21st!! All he has to do is upload them to facebook so I can steal them for you to see. Sheesh. Hope you loved it :)
 |
| Wearing her Queen of Hearts dress that her Grandma Deb made her! |
 |
| Me and the birthday girl. |
 |
| Hangin out with Alice. Dang. My kid has crazy hair! |
 |
| The flamingo tablecloth is actually a shower curtain from Target. |
 |
| Cupcakes I made for her party. It was my first attempt so they aren't PERFECT. |
 |
| Kool-aid bursts with tags that say "Drink Me" to resemble the little vial of potion Alice drinks in the movie. And plastic milk bottles with a blue sugar rim and paper straws from etsy. |
 |
| Adam's yummy deviled eggs on the left. And on the right are my teacup shaped deviled egg tea sandwiches. Which were a huge hit. I just diced up hardboiled egg, put all the crap in a bowl, added the salad dressing, mustard, pickle juice, and salt/pepper/paprika and voila..... deviled egg salad! They went quick. |
 |
| A view of the table |
 |
| All of the characters from Alice in Wonderland came over for Kinsley's party! |
 |
| Kinsley and her best friend taking a snack break. There's always time for cheeseballs!! |
Friday, December 9, 2011
Swiss Steak and Haircuts.
Today I attempted to give my child her first haircut. And Lordy, Lordy that was a fiasco! She knows scissors are "dangerous" so every time I tried to get near her hair she would scream and wiggle and cry.... really loud. I had to cut the back while she sat on the floor playing with my makeup, which was pretty successful. I just had to be super sneaky when I brought the scissors up towards her head. The front was a different story... I had to wrap her in a towel like a baby burrito to get her hands out of the way and then had to make sure i didn't poke her eye out. I would say that it was incredibly difficult and I wish I could pay someone to come to my house and do it for me next time. I only poked her with the scissors once. hehe. I joke. I'm just glad I didn't take her out in public to try to cut her hair because that tantrum she threw would have been so embarrassing in public, and I hate subjecting innocent people to her. She's crazy and I feel bad when she loses her sh*t in public, mostly I just hate the looks people give me when she goes bonkers, like I'm a terrible mom for not being able to control my child. Well, guess what folks!? Sometimes I can't control her and I'm pretty sure she controls me at this point. She's 2. It is the beginning of the end. And I tried to do a before/after photo of her but that didn't quite work out so I will continue attempting to get a picture of her and get one up here soon!
And now, dinner of the week was Easy Swiss Steak! (not sure why they call it "Swiss" there's not even any cheese in it which really upset me)
1 - 1.5 lb round steak
2 Tbsp shortening (Crisco)
1- 10 oz. Can Golden Mushroom Soup
1 can Diced Tomato - I don't know the ounces, just use the average size.
1/4 c. chopped onion
1/4 c. chopped green pepper
salt & pepper to taste
1 c. flour
1/4 c. cornstarch
Add the shortening to an electric skillet (that's what the directions I have say, but since I do not own one of those I just use a normal skillet on the stove) so, add your Crisco in the skillet, it will melt in about 3 seconds... or maybe longer. I just made that up.
Mix the flour and cornstarch in a bowl. Set aside.
Now get your round steak. You can either cut it in half where there's that line of fat, and make 2 large pieces. But I didn't do that, I diced mine up into about 8 small pieces, so they would cook faster. I coated them in the flour/cornstarch mix and then stuck them in the pan and got them nice and crispy. You just need to brown them but I wanted mine crispy so I let them cook a little longer.
Take your chopped onion, pepper, tomatoes, and mushroom soup and add them to the skillet. Add salt and pepper then turn to med-low and let simmer for 1-2 hours. However long it takes for the meat to become tender. You can add water to maintain moisture towards the end. I would also suggest putting a lid on your skillet. I didn't have one of those either... I am a total failure in the kitchen, so I put a pan over the top of my skillet to keep moisture in. You gotta work with what you have!
Serve with mashed potatoes, or over rice. Or don't serve it with anything. No one really cares.
Now that that's done, wanna see a funny picture of my kid sleeping? She's such a goof!!

And now, dinner of the week was Easy Swiss Steak! (not sure why they call it "Swiss" there's not even any cheese in it which really upset me)
1 - 1.5 lb round steak
2 Tbsp shortening (Crisco)
1- 10 oz. Can Golden Mushroom Soup
1 can Diced Tomato - I don't know the ounces, just use the average size.
1/4 c. chopped onion
1/4 c. chopped green pepper
salt & pepper to taste
1 c. flour
1/4 c. cornstarch
Add the shortening to an electric skillet (that's what the directions I have say, but since I do not own one of those I just use a normal skillet on the stove) so, add your Crisco in the skillet, it will melt in about 3 seconds... or maybe longer. I just made that up.
 |
| Who DOESN'T love cooking with this stuff!? I'm just glad it's so healthy. hahaha. |
Mix the flour and cornstarch in a bowl. Set aside.
 |
| Put this sh*t in a bowl. C'mon now, it's not hard! |
Take your chopped onion, pepper, tomatoes, and mushroom soup and add them to the skillet. Add salt and pepper then turn to med-low and let simmer for 1-2 hours. However long it takes for the meat to become tender. You can add water to maintain moisture towards the end. I would also suggest putting a lid on your skillet. I didn't have one of those either... I am a total failure in the kitchen, so I put a pan over the top of my skillet to keep moisture in. You gotta work with what you have!
 |
| Here you have it! It looks like nasty sh*t but it's my boyfriend's favorite meal. |
Now that that's done, wanna see a funny picture of my kid sleeping? She's such a goof!!

Oh! One more thing. Is it acceptable to duct tape your child's diaper onto them to get them to keep it on? Kinsley will not wear her diaper and takes them off all the time and hides them from me. Then, she will proceed to either pee or sh*t on the floor. But she will NOT sit on the toilet to try to pee because it "scares her". Geeeeez. I'm such a lucky mom, I know. If you have any helpful advice onto how I can get her to use the big girl potty I would greatly accept ALL of it! At this point I am willing to try everything. Keep in mind, my child DOES not listen to me, so trying to tell her she can get stickers or candy if she goes potty does not work.
Sunday, December 4, 2011
Check out this crazy kid!
Well.... this entry is solely dedicated to the crap my kid gets into. Here's a list of the top 5 things she wants to make a mess with
5. Pancake Mix
4. Makeup
3. Baby Wipes
2. Dog Food
1. Baby Powder.. or any kind of powder. She dumped Adam's foot powder all over the house one time.
This kid will make a mess of anything she can get her hands on. She came up to me the other day to tell me how her shoes were sparkly and I assumed she was just wearing sparkly shoes and then I looked at her and saw this...
Oh.... and baby powder??

5. Pancake Mix
4. Makeup
3. Baby Wipes
2. Dog Food
1. Baby Powder.. or any kind of powder. She dumped Adam's foot powder all over the house one time.
This kid will make a mess of anything she can get her hands on. She came up to me the other day to tell me how her shoes were sparkly and I assumed she was just wearing sparkly shoes and then I looked at her and saw this...
 |
| Here she is covered in mommy's make up! Oh and it wasn't only over her new birthday clothes and her face, but also embedded into the carpet in her bedroom and all over her blankets. Gimme a break! |

 |
| These pictures were taken on TWO separate occasions. But don't be fooled.... there were many more than that. |
I don't have photos of the messes she has made with the baby wipes, dog food, and pancake mix. BUT let me tell you.... this is a battle I wage on a daily basis. If I turn my back for one second, everything turns to sh*t. Oh and speaking of sh*t.... that actually would've been in the Top 3 because I can't even count the number of times I have had to clean poo out of her hair, off her body, out of her sheets, off her toys, off the wall... I could keep going but I think you get the point. I like to call her my Child of Mass Destruction. It's only fitting. If anyone has any AMAZING stories of their messy little children or any funny pictures PLEASE share :)
Crafts from the Past
Hey guys! It's been a couple days since my last post. Sorry. But this momma had a super fun night out on Friday and then spent Saturday curled up in the fetal position trying to not vomit. Anywho..... I am here to share some of my crafts from the past. They aren't detailed, but who cares. I'll explain them to the best of my ability. And if you have any questions you can always e-mail me at jayandkin@gmail.com Okay, here we go....
Project #1
Shabby Chic Dresser
I got a dresser like this when I moved to college.... it was a little different but this is pretty similar. This one is from Nebraska Furniture Mart's website: http://www.nfm.com/DetailsPage.aspx?ProductID=21755129
 I got real tired of it's ugly color and wanted something a bit fancier, so I painted it a dark brown with a beige trim on the top that had a very faint zebra print. I have an animal print obsession.... fun fact about me! Anyway, that was college. When I moved into my boyfriend's house I decided that the spare bedroom was going to be ALL mine. I found this AMAZING white ruffled quilt at Urban Outfitters ( I think online it's called the Waterfall Duvet) for 75% off and pillow shams 75% too so I had to buy it, and I could have either bought a new dresser or give my old one a makeover again and since I'm a cheap ass I went with option number two. I opted for a shabby chic feel and this is what I came up with....

This was a pretty simple project, it just took time to let everything dry, then add another coat, and wait even longer. The one downfall to painting is you don't get immediate results, and I have zero patience when it comes to things like this. I just want them to be in my bedroom looking pretty, sort of how I like my men ;) Haha. Okay, well onto the next one.
PROJECT #2
Baby Letters
While I was pregnant with my daughter I told myself there was NO way I am painting her room or putting anything in there that is pink. I opted for a coral, teal, and dark brown color scheme instead. I think my mom bought me the letters from Hobby Lobby.... or maybe Joann Fabrics. I'm not entirely sure.
What you need:
Wooden Letters
1 color of acrylic paint (those cheap $0.89 bottles from the craft store)
Paint pen or two depending on how many colors you want (I used 1)
Stick on rhinestones
Random swirly diecut things I found in the scrapbooking area of Hobby Lobby
Oh, and don't forget your Tacky Glue!
I painted each letter a coral color, and once they were dried I took my scrapbook brown swirly things and cut them up.
They looked like this KINDA...
I cut them up to the size I liked and just stuck them on my letters with tacky glue (I try to use tacky glue for everything, sometimes I fail. Like when I tried to tacky glue my pumpkin back together on halloween when I carved out a chunk I shouldn't have) but in this case, it worked. My kid just turned 2 and these still look perfect above her bed. Anyway, I glued on the brown swirls, then I took my teal colored paint pen and drew on some more swirls.

For the finishing touch, I added on some sticky rhinestones and added some ribbon to the back with.... wait, try to guess. Did you guess TACKY GLUE!! You are correct! To hang them up i glued two pieces of ribbon to the back of each letter, tied a bow with the ribbon, and then stuck them in the wall with thumb tacks. So easy! If you don't like the fancier version I made, you could always just go buy a couple paint pens and draw your own pattern. Be creative and get funky and I am sure it will look awesome!
Project #3
Bedazzled Skull Faces
Okay, one more super easy craft that I did last year for Halloween. OOH! Another fun fact, Halloween is hands down my FAVORITE holiday ever. Spooky ghosts, spiderwebs, pumpkins, candy, costumes.... I could go on and on about how much I love Halloween but I won't. Not today at least.

What you need:
Silver metallic spray paint
Large stick on rhinestones
cradboard skull faces
Are you ready?? Okay, here's what you do. Take your paper skulls outside, place them on your lawn (or your neighbors if you don't want silver grass), and spray them with your spray paint. Take your stick on rhinestones, plop them onto the skull and you're done. WOW! You could put on a clear spray finish, but I didn't know what to use and I didn't care because this project was pretty cheap. And to hang them up, you can add a ribbon to the back with none other than TACKY GLUE and hang them on a nail. I like to hang mine vertically with the non jeweled one in the middle. So cute, super easy, go try it because you won't be disappointed. Anyway, that's enough of my crafts from the past. If I think of any other ones I feel like I need to share.... I will share them. But for now.... I am done!! Hope you guys learned something. And if you didn't, then.... I don't know what to tell you. BYE!
Project #1
Shabby Chic Dresser
I got a dresser like this when I moved to college.... it was a little different but this is pretty similar. This one is from Nebraska Furniture Mart's website: http://www.nfm.com/DetailsPage.aspx?ProductID=21755129

 |
| For the pinstripes I used blue painters tape and just started on one side of the drawer and put a piece down. Then I left a tiny space in between and laid the next piece of tape next to it and so on and so on. I don't like rulers and measuring tape and that crap so I just eyeballed it, if you want to be precise you could measure out a cm or however wide you would want your pinstripe to be. But I'm like a honeybadger and I don't give a F**K! |
 |
Finished product. Sorry I have no pictures of me actually painting this. I did this a couple years ago, long before the thought of blogging ever planted it's little seed in my brain. |
 |
I painted over the dark brown color and then sanded off some of the corners to get a distressed feel. It definately adds some characted and who would've guessed this dresser EVER looked like the one in that first picture? Soooo much easier and cheaper to DIY... or so I think. |

This was a pretty simple project, it just took time to let everything dry, then add another coat, and wait even longer. The one downfall to painting is you don't get immediate results, and I have zero patience when it comes to things like this. I just want them to be in my bedroom looking pretty, sort of how I like my men ;) Haha. Okay, well onto the next one.
PROJECT #2
Baby Letters
While I was pregnant with my daughter I told myself there was NO way I am painting her room or putting anything in there that is pink. I opted for a coral, teal, and dark brown color scheme instead. I think my mom bought me the letters from Hobby Lobby.... or maybe Joann Fabrics. I'm not entirely sure.
What you need:
Wooden Letters
1 color of acrylic paint (those cheap $0.89 bottles from the craft store)
Paint pen or two depending on how many colors you want (I used 1)
Stick on rhinestones
Random swirly diecut things I found in the scrapbooking area of Hobby Lobby
Oh, and don't forget your Tacky Glue!
I painted each letter a coral color, and once they were dried I took my scrapbook brown swirly things and cut them up.
They looked like this KINDA...
 |
| These are from http://www.opentip.com/Home-Garden/Company-Diecut-Pc-Swirls-Frames-p-2359495.html The ones I bought didn't have birds or flowers, just the almost cardboard-type swirls and they were all brown. But this gives you an idea. |

 |
| Voila |
Project #3
Bedazzled Skull Faces
Okay, one more super easy craft that I did last year for Halloween. OOH! Another fun fact, Halloween is hands down my FAVORITE holiday ever. Spooky ghosts, spiderwebs, pumpkins, candy, costumes.... I could go on and on about how much I love Halloween but I won't. Not today at least.

What you need:
Silver metallic spray paint
Large stick on rhinestones
cradboard skull faces
Are you ready?? Okay, here's what you do. Take your paper skulls outside, place them on your lawn (or your neighbors if you don't want silver grass), and spray them with your spray paint. Take your stick on rhinestones, plop them onto the skull and you're done. WOW! You could put on a clear spray finish, but I didn't know what to use and I didn't care because this project was pretty cheap. And to hang them up, you can add a ribbon to the back with none other than TACKY GLUE and hang them on a nail. I like to hang mine vertically with the non jeweled one in the middle. So cute, super easy, go try it because you won't be disappointed. Anyway, that's enough of my crafts from the past. If I think of any other ones I feel like I need to share.... I will share them. But for now.... I am done!! Hope you guys learned something. And if you didn't, then.... I don't know what to tell you. BYE!
Subscribe to:
Posts (Atom)