Pages

Tuesday, April 22, 2014

The Frosting Chair

Bentwood Chair Upcycle!


This chair was found by my mother in law at a garage sale for $5. Of course I just knew something cute could come of it! So I dug through some fabric scraps and found an unused can of spray paint and got to it. It was a little trickier than I had originally anticipated. Normally when I do a chair, the seat comes out and makes it really easy to upholster but not this one! I had to peel off the fabric trim that was glued on, then rip off fabric and tear out staples. It was a mess. But I powered through. Then I had to start stapling my new fabric down... not so easy when there are chair pieces blocking the area you need to staple. But I think I did it just fine! Painted... check. Upholstered... check! Now I just needed to find some trim to cover up my messy, stapled, raw fabric area. No big deal. I hit up the local fabric store in search of upholstery trim. Lo and behold there were SO MANY choices!! So I bought 3. A neutral, a frilly one, and a bright green one (it was like 75% of too - bonus!) The neutral was ehhh, the green was fabulous but the blue rosette was my absolute favorite! It was so girly and added just the right touch of chic to this little chair's shabbiness! Got the hot glue gun out, applied the trim, and this little baby was good to go! I think the rosette trim looks just like the frosting on a cake, this chair just makes me want to go sit in a little cupcake shop or ice cream parlor. So cute!

Total cost: $15

 Boom.


Old fabric torn off, spray painted white.

New fabric stapled on, as you can see the edges are pretty rough!

Here she is, I just adore the rosette trim!!

It just looks like cake frosting, it's adorable!


Monday, April 21, 2014

Little Odds and Ends!

Hexagon Side Tables

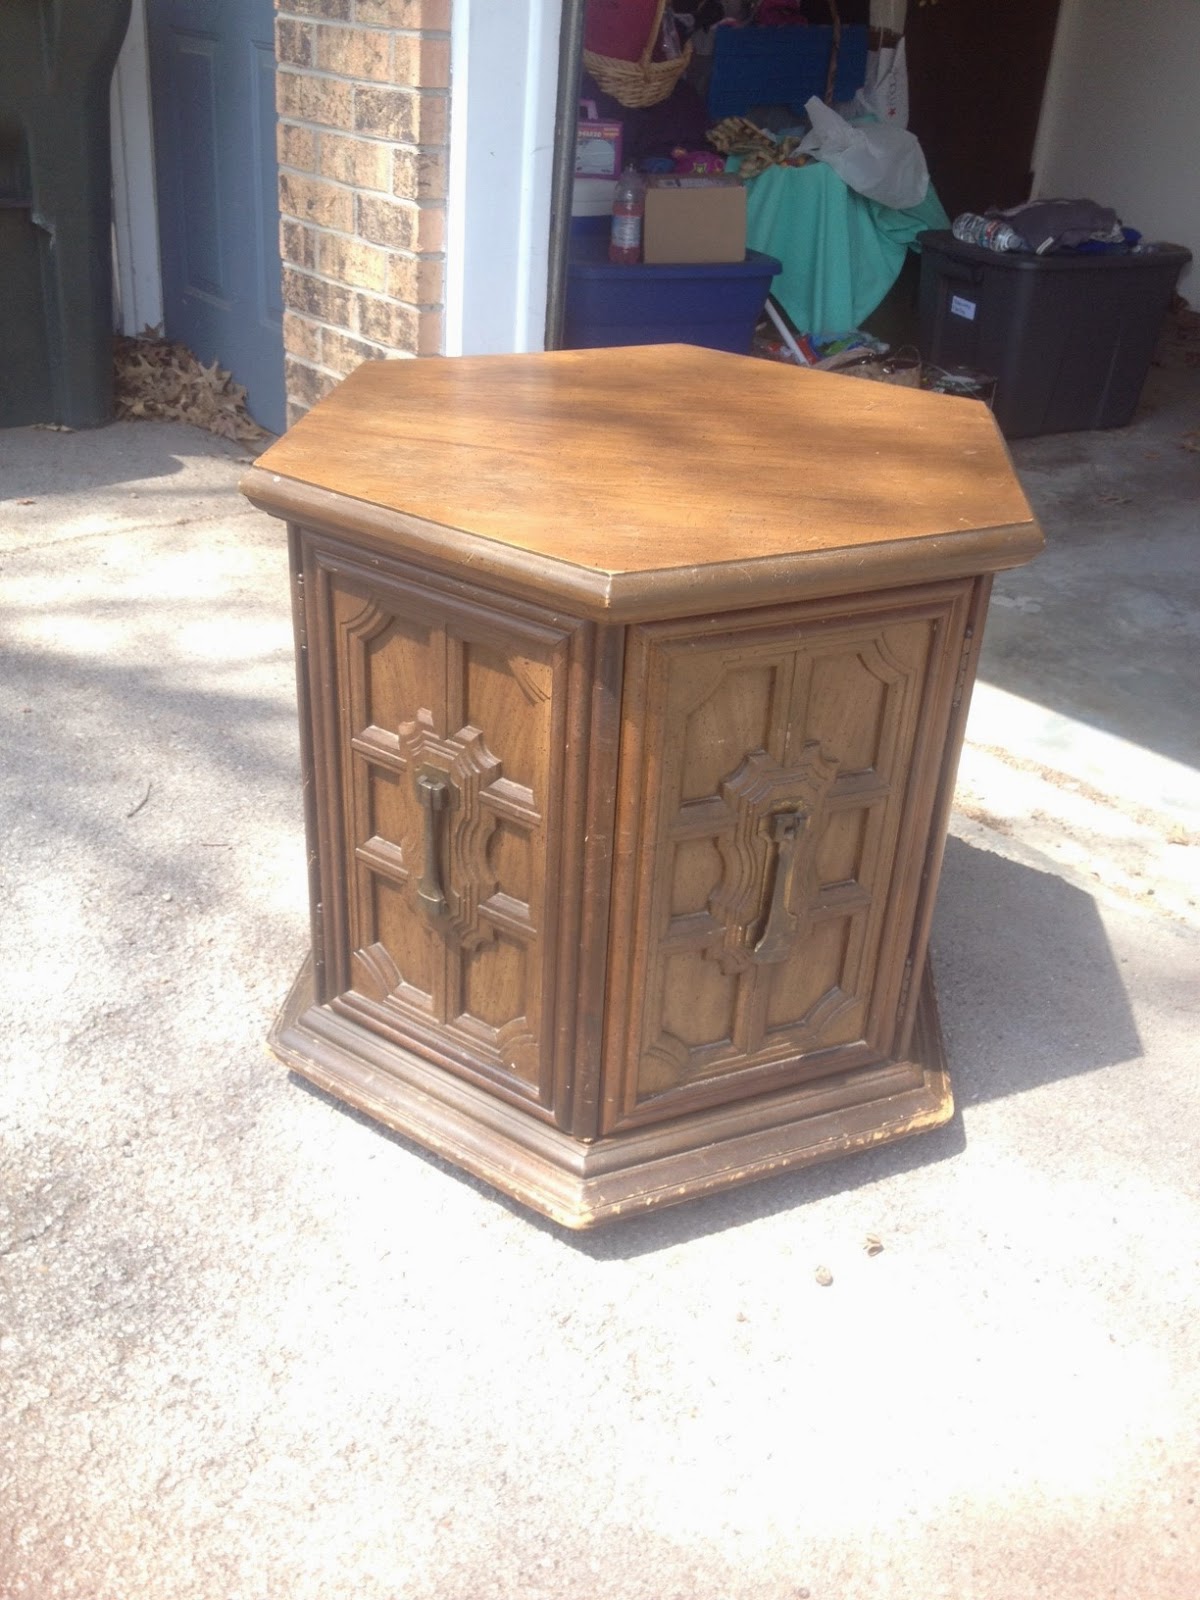
Would you believe me if I told you I got TWO of these tables for $13 total!? Crazy right?? Who would want to part with these beautiful end tables for such a ridiculously low price? Not me! I just love the shape, the doors, the hardware... these little guys are great! I have actually finished one of them in a nice turquoise color, not sure if I want to do the second one the same and sell as a set or do a chalk paint and antique finish on the other one and sell individually... Also I kind of want to keep one. For the price I paid, it really wouldn't hurt my budget if one of these didn't sell. I am trying to talk myself into it haha.


UPDATE: I painted the second one a lime green, it looks fabulous. And I sold them both. Wooooohooo!

Total Cost: $25


Bought 2 of these at a little antique thrift store for $6 a piece! What a steal!!


Spray paint used to be my friend, after this table... not so much. I'm in hand cramp central over here!


 And here are the last 2 things that I forgot to take before pictures of... I always do that. I have a nice, fancy little camera and either I take pictures with my shattered POS iPhone or I totally forget to take a before pic at all. I blame it on Mommy Brain, it's a disease. You forget your phone, your keys, your phone... I said that. Okay well here are a few more things I restored. I'm going to end this for tonight because things might get weird if I don't. Toodle-oo Kangaroos!


This was a $10 swap & shop find, I think it is absolutely gorgeous. The beads and the little cherubs, sooo cute!!

Last, but not least, another swap & shop find that has been sitting in my daughter's room untouched for about a year. I took her to home depot and let her pick out the color and this is what she chose. I'd say it was a mighty fine choice!

Dip Dye Obsession!

Dip Dyed & Upholstered Elephant Chair
 
This is BY FAR one of my absolute most favorite pieces I have done so far. It has such a funky charm to it, I actually can't force myself to part with it. It's up in my living room now, I think it has found it's forever home... for now. Until I find something that I love even more, who knows. I change my mind like I change my underwear. Anyway, here are some photos!

Total Cost: $35


This was a swap & shop find, for $15 I couldn't pass it up! It had such wonderful potential.


I decided to do the front and back of the back piece different fabrics to switch things up. I really love how it turned out and it matches my living room PERFECTLY!!


 The elephants, the colors, the dip dyed legs.... TO. DIE. FOR. I am slightly obsessed with the dipped legs right now, it gives it a great pop of color without making the chair too overwhelming. Plus it's really easy. I went to an estate sale recently and found some fabric for SUPER cheap and had planned on using it for this chair but I decided to hit up Joann's just for shits & giggles and found these fabrics and I just knew exactly what to do with the chair. I'm a proud mama bear right now :)


Chevron Side Table DIY


Navy Chevron 1950's Table DIY
 
This piece is very simple, slightly destroyed, but still a funky little table. I got it for free so I really didn't care what I was doing to it but I knew I didn't want to do anything too overwhelming. It's a very mid century/1950's piece, I thought it would be adorable for some plants or to unscrew the legs and hang it as a piece of wall art. So many possibilities! I opted for a thick chevron pattern, I've done chevron before so I knew what I was doing. I used a carpenter's square to get precise angles, measuring tape to make sure each chevron section was the same width apart, and then taped it down and got to work!

Total Cost: $9


The before. What a mess. I had to take off the shelf piece because it was completely broken on the other side. Not a big deal though!


Primed and taped. I used a carpenter's square to make a precise chevron. Pretty simple stuff.


Finished product!


This little guy just went off to a new home this evening. It really makes me happy that this stuff is selling so quick, I feel like I'm finally on the right track! Painting furniture makes me happy, it puts me in the zone and I feel such a sense of accomplishment once a piece is on it's way to looking like a million bucks! I will be posting several other items I have done so keep your eyes peeled!


My new business venture, adventure!

Recently I have decided that instead of answering to "The Man" that I was going to continue being a stay at home mom but I am going to try to start up a little side business/hobby thing. I have been painting furniture for a while now but have kept everything I painted, never thought about selling it. I decided that since I have all this free time, tons of space, why not try to venture into the upcycling furniture world! I am really, really excited! I have my mother-in-law helping me find these junky old pieces, which has worked out great because we have found LOTS of awesome things. She is my junker and I am the creative eye. I see something and just know what I would want it to look like and then I try to do it! I have found that local Facebook swap & shop pages are by far the easiest way to get your name out there. I am on maybe 4 or 5 different swap pages and it is so much easier than craigslist or etsy. It's free and it's local, can't beat that for starting out! And for those of you that don't know what a swap & shop is, it's a Facebook group with several hundred to several thousand members. You post a picture of the item you have for sale; clothing, furniture, whatever it is, put a price on it, where you are located and how far you are willing to meet and wait for the fish to bite. It has worked well so far! Out of the 3 things I have listed, 2 have already sold and one is getting picked up at the end of the week! YAY!!! Okay, without further adieu, here is my first project!


Floral Upholstered Bench DIY
 
So here is the very first piece I finished, and I am selling it this week! I covered it in a bright blue exterior paint and found a great outdoor fabric for 40% off at Joann. I think it turned out great for my first attempt at upholstery. I would keep it but honestly, I have no idea where I would put it and it doesn't even come close to my color scheme.

Total Cost: $30


Before picture, this thing was covered in some pretty hideous fabric. Ick.


Primed in a dark grey, ready for some fun!!
 

Final product. Look at how the colors just pop! It is so bright and cheerful, I absolutely adore this little bench!

  EEEEEEK! How lovely it turned out!! So bright and cheerful. Man, it was a drabby little thing before, such a sad little bench. But now it's just the cutest little thang!

I am so excited to get the ball rolling and start churning out some stellar pieces! There are some awesome pieces I've acquired recently and I am pretty sure they are going to turn out AMAZING. So come back soon for more!