Pages

Monday, May 19, 2014

Chalk Paint - first attempt!

Chalk Paint Side Table


I have heard many wonderful things about chalk paint and in all reality I have been wanting to try it forever. The only thing that held my back was the price. I decided before I attempted making it myself or buying a giant, expensive can, I would give one of the sample sizes at home depot a try. And I am really glad I did! This stuff is great. No sanding AND no priming... I'm in. So I may have not splurged on the paint at all, but to finish it off I definitely splurged on the wax. Let me tell you, Annie Sloan ain't cheap! Over $50 for 2 cans of wax, all I could think was "This better work and be the most amazing thing in the history of ever" And I have to say, the distressed look is phenomenal. I couldn't do that without this wax, there is no way. I hate sanding, plus I'm not that great at it. But with the chalk paint and texture on the furniture, you don't have to do much to get that great, antique finish. SO I am SOLD on this chalk paint. Count me in. Next time I will try making my own though, just out of pure curiosity.


Before the wax


Dresser Restore

Mint Green Chest of Drawers


This piece... ugh. What a giant pain in my ass. I mean, I did not get a chance to fully inspect this before it was delivered because the lady had it FULL of junk. So my mother in law delivers it to me, I just give it a quick glance and all looks good, nbd. I open it up and the drawers have holes and cracks and it's missing this and this is broke, blah blah blah. It was just a hot, hot mess. So I wasn't very inspired. I started off just painting the top white and waxing it with Annie Sloan clear and dark wax. I left it like that for a few days because I thought I was done haha. No, I kept walking by it in my garage and I just couldn't stand the sight of it. Brown and white, those are not my 2 favorite colors.


I had some paint that my father in law had given me, so I decided to mix in a little white paint to tone it down and make it a little more "minty". I am very happy with the external results. As for internal, not so much. The drawer stops are apparently very vintage and nobody could help me find replacements. Only about half the stops were actually still there, so the drawers would slide back too far and it wasn't flush with the outside of the dresser. So I rigged it with some U-shaped staple things instead. Cool. Next was to tackle the shitty drawers. I filled all the holes and cracks, even stapled a few places together, added some nails to reinforce. Lots of stupid work. It definitely did not make the drawers more appealing. No one wants to see that crap. Actually let me back up one second, I don't know how to make drawers so the route I chose was the "easy" way out. Someone else can make a new drawer bottom if they MUST have it.  I am not selling or buying high-dollar pieces, so my cheating ways are what works. Continuing... the drawers looked like crap, no one wants to see that. I decided contact paper would be the way to go... and it works.


 It looks really nice. It just has some issues. If you want a cute dresser, this one is it! I have actually been talking myself out of replacing the dresser I have in my guest bedroom with this one... we shall see. But I really hope someone buys it so I don't have to move it up the stairs into my room haha.

Tuesday, April 22, 2014

The Frosting Chair

Bentwood Chair Upcycle!


This chair was found by my mother in law at a garage sale for $5. Of course I just knew something cute could come of it! So I dug through some fabric scraps and found an unused can of spray paint and got to it. It was a little trickier than I had originally anticipated. Normally when I do a chair, the seat comes out and makes it really easy to upholster but not this one! I had to peel off the fabric trim that was glued on, then rip off fabric and tear out staples. It was a mess. But I powered through. Then I had to start stapling my new fabric down... not so easy when there are chair pieces blocking the area you need to staple. But I think I did it just fine! Painted... check. Upholstered... check! Now I just needed to find some trim to cover up my messy, stapled, raw fabric area. No big deal. I hit up the local fabric store in search of upholstery trim. Lo and behold there were SO MANY choices!! So I bought 3. A neutral, a frilly one, and a bright green one (it was like 75% of too - bonus!) The neutral was ehhh, the green was fabulous but the blue rosette was my absolute favorite! It was so girly and added just the right touch of chic to this little chair's shabbiness! Got the hot glue gun out, applied the trim, and this little baby was good to go! I think the rosette trim looks just like the frosting on a cake, this chair just makes me want to go sit in a little cupcake shop or ice cream parlor. So cute!

Total cost: $15

 Boom.


Old fabric torn off, spray painted white.

New fabric stapled on, as you can see the edges are pretty rough!

Here she is, I just adore the rosette trim!!

It just looks like cake frosting, it's adorable!


Monday, April 21, 2014

Little Odds and Ends!

Hexagon Side Tables

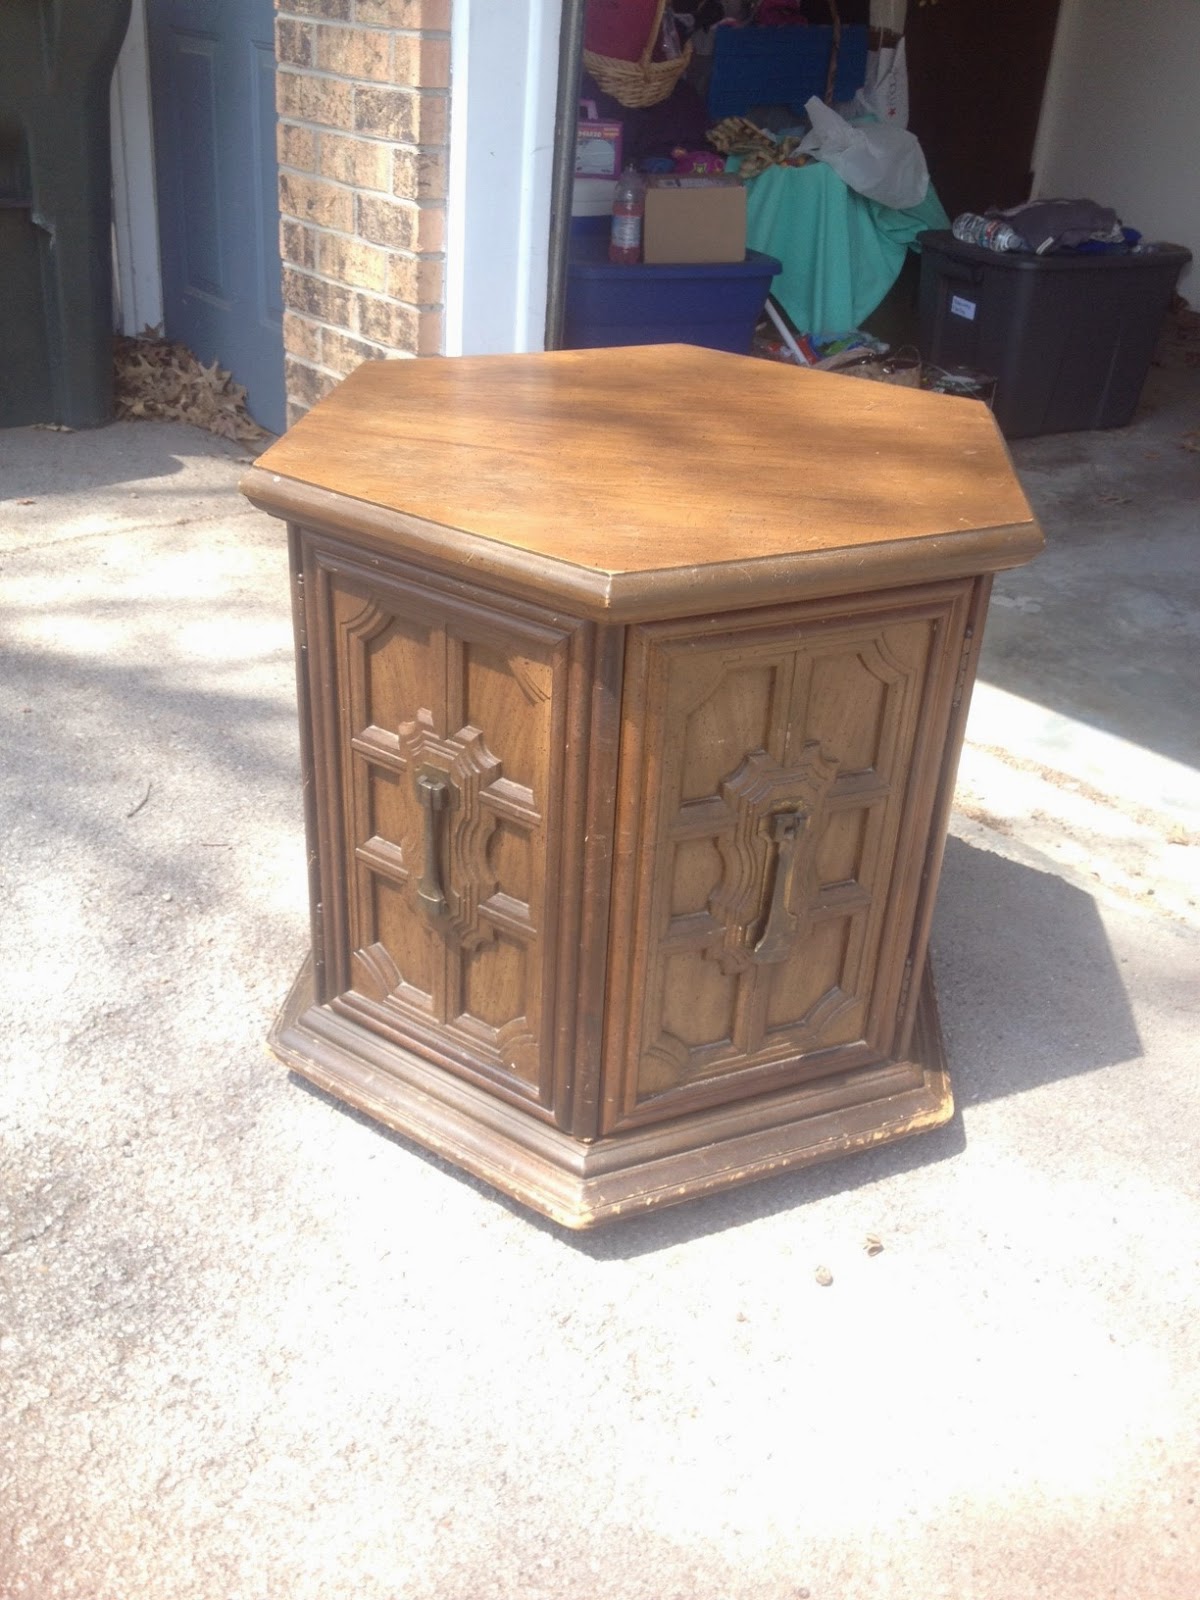
Would you believe me if I told you I got TWO of these tables for $13 total!? Crazy right?? Who would want to part with these beautiful end tables for such a ridiculously low price? Not me! I just love the shape, the doors, the hardware... these little guys are great! I have actually finished one of them in a nice turquoise color, not sure if I want to do the second one the same and sell as a set or do a chalk paint and antique finish on the other one and sell individually... Also I kind of want to keep one. For the price I paid, it really wouldn't hurt my budget if one of these didn't sell. I am trying to talk myself into it haha.


UPDATE: I painted the second one a lime green, it looks fabulous. And I sold them both. Wooooohooo!

Total Cost: $25


Bought 2 of these at a little antique thrift store for $6 a piece! What a steal!!


Spray paint used to be my friend, after this table... not so much. I'm in hand cramp central over here!


 And here are the last 2 things that I forgot to take before pictures of... I always do that. I have a nice, fancy little camera and either I take pictures with my shattered POS iPhone or I totally forget to take a before pic at all. I blame it on Mommy Brain, it's a disease. You forget your phone, your keys, your phone... I said that. Okay well here are a few more things I restored. I'm going to end this for tonight because things might get weird if I don't. Toodle-oo Kangaroos!


This was a $10 swap & shop find, I think it is absolutely gorgeous. The beads and the little cherubs, sooo cute!!

Last, but not least, another swap & shop find that has been sitting in my daughter's room untouched for about a year. I took her to home depot and let her pick out the color and this is what she chose. I'd say it was a mighty fine choice!

Dip Dye Obsession!

Dip Dyed & Upholstered Elephant Chair
 
This is BY FAR one of my absolute most favorite pieces I have done so far. It has such a funky charm to it, I actually can't force myself to part with it. It's up in my living room now, I think it has found it's forever home... for now. Until I find something that I love even more, who knows. I change my mind like I change my underwear. Anyway, here are some photos!

Total Cost: $35


This was a swap & shop find, for $15 I couldn't pass it up! It had such wonderful potential.


I decided to do the front and back of the back piece different fabrics to switch things up. I really love how it turned out and it matches my living room PERFECTLY!!


 The elephants, the colors, the dip dyed legs.... TO. DIE. FOR. I am slightly obsessed with the dipped legs right now, it gives it a great pop of color without making the chair too overwhelming. Plus it's really easy. I went to an estate sale recently and found some fabric for SUPER cheap and had planned on using it for this chair but I decided to hit up Joann's just for shits & giggles and found these fabrics and I just knew exactly what to do with the chair. I'm a proud mama bear right now :)